Installation & management · support@itsupportex.com · 1-888-884-6246
Proxmox Qdevice Monitoring
Make Qdevice connection and voting status easier to inspect in your Proxmox cluster.
Reviewed release: PVE 8.3.0 build v1
1. Before installation
This installer specifically targets pve-manager 8.3.0. Existing configured corosync Qdevice, python3, ping and corosync-qdevice-tool are required. Obtain a matching build for other versions.
- Record the platform/application version and select its matched release.
- Back up configuration, application data and persistent storage; verify how to restore them.
- Read the included installer and release notes. Use a new extraction directory, preserve existing data and arrange a maintenance window.
- Obtain the package from IT Supportex and verify its published checksum when supplied. Do not paste licence keys or passwords into a support ticket.
2. Install or upgrade
These are server/application plugins, not WordPress plugins. Commands below apply only to the named release and environment.
pveversion
bash install-pve8.3-qdevice-cluster-monitor-v1.sh install
systemctl status pve-qdevice-monitor.timer --no-pager
Run CWP and Proxmox commands as root on the intended target. For Leantime, run the bundled installer from its extracted directory on the Docker host and replace the container placeholder. Confirm filenames exist before executing.
3. Configure and verify
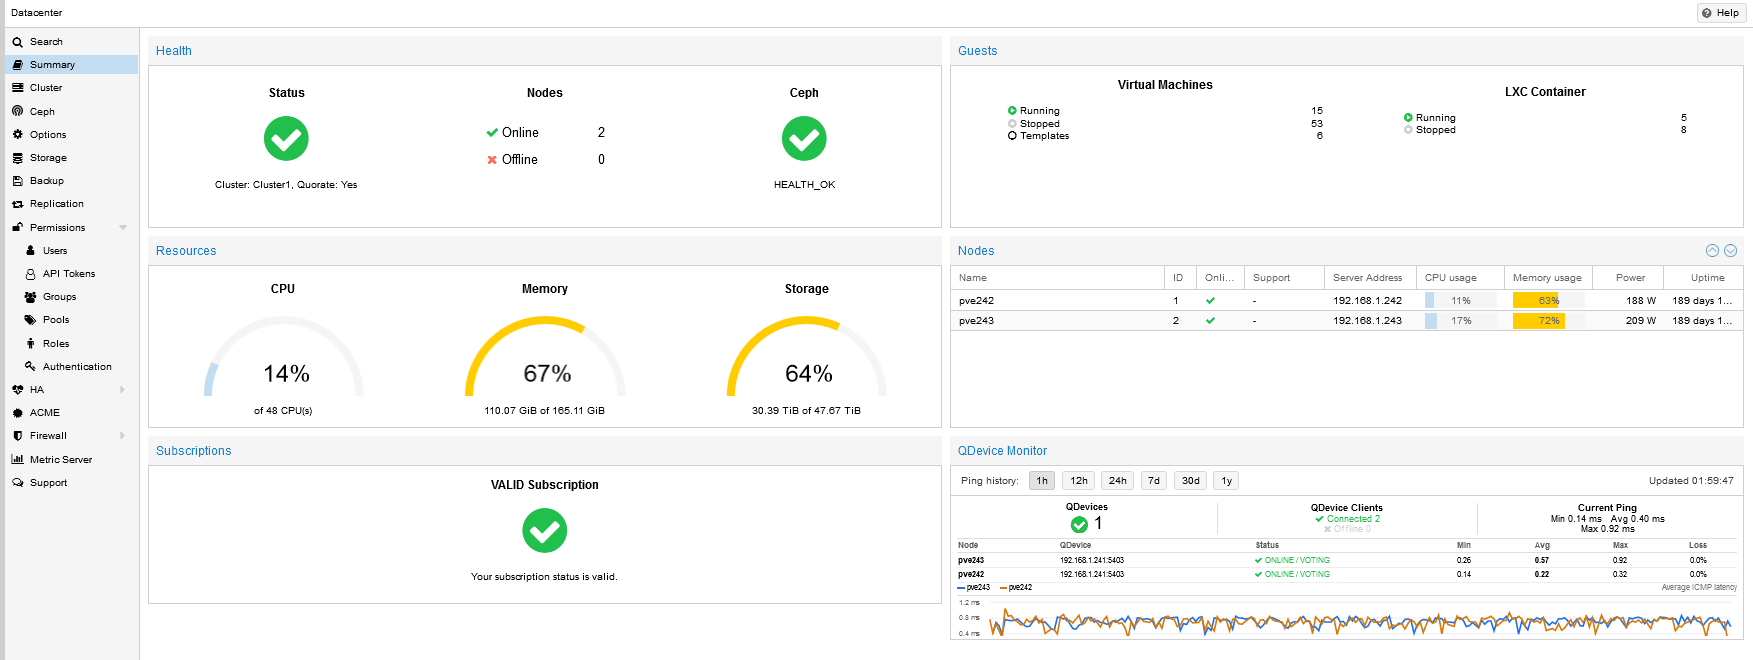
Install on every real cluster node that should contribute local history. Open Datacenter → Summary and hard-refresh. Check connected/voting status, Qnetd target, packet loss, latency and collector timer. History begins after installation. Monitoring does not set up quorum or guarantee availability.
4. Upgrade and recovery
The installer snapshots API/dashboard files and restarts pvedaemon/pveproxy. The -remove action restores original files and deletes collected history and installer backups after success; export history and retain independent backups first. Do not use FORCE to bypass version checks without engineering review.
5. Get assistance
Send the platform version, plugin version, exact failing step and sanitized error output to support@itsupportex.com. We can scope installation, configuration, validation, documentation and management services for your environment.
Source basis & limitations
install-pve8.3-qdevice-cluster-monitor-v1.sh, header, monitor implementation and platform checks
Instructions were reviewed from accessible release material; they have not been executed on your server during this website update. Licence and compatibility terms must match the actual distributed build.